Showing posts with label dessert. Show all posts

Friday, May 13, 2016

An ordinary, wonderful spring day

IMG_8873

I couldn't have predicted that today would be one that I would especially want to remember. We had an extra three-year-old hanging out with us all day, we just moved into a new house and things are still quite chaotic, and I had a dentist appointment scheduled in the afternoon. A hum-drum day, at best.

I woke up and, suspecting that I would not have a lot of time to myself throughout the day, I immediately treated myself to a shower, complete with hair-washing. I put on makeup and got dressed before going downstairs.

I made coffee, and as I sat sipping it and reading, I heard Anne wake up. I heard her pad into my bedroom where Eleanor was still sleeping. Anne knows to check and see if Eleanor's head is popped up before talking to her - if her head is still down, she silently creeps back out of the room. She must have been awake, because Anne greeted her in the sing-song voice she saves for her baby sister, then sang the song I sing to them every morning as soon as everyone's awake:

Good morning to you!
We're all in our places with bright shining faces
and this is the way we start out our day!

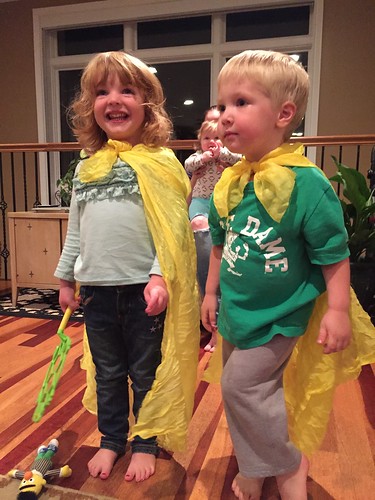
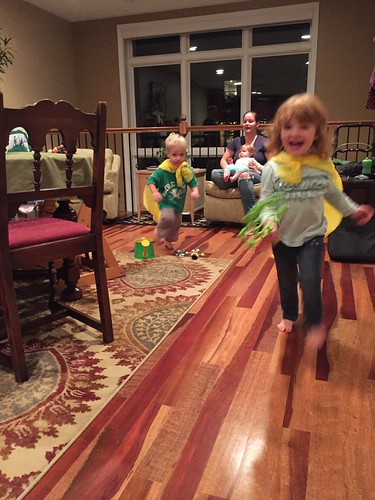
Unable to resist seeing their sweet faces at that point, I joined them upstairs, and then we all came downstairs for breakfast and read-aloud time. Soon after that, our 3-year-old buddy Evan (son of some of our dearest friends from college) arrived, and he and Anne ran off to play.

I nursed Eleanor, put her peacefully in her pack and play, and she went to sleep for 2 hours. 

Anne and Evan quickly took up residence in the back yard. For almost 3 hours. As aforementioned, we just moved in, so we don't have a lot of outside toys. I found a plastic tub, a funnel, some plastic cups and bowls, and our sand toys, filled the tub with the hose, and let them have at it. I left the door open and listened as that tub of water morphed from a stew to a "mixture" to a mud puddle (after they dug up some dirt from under our fence and mixed it all together).

IMG_8866

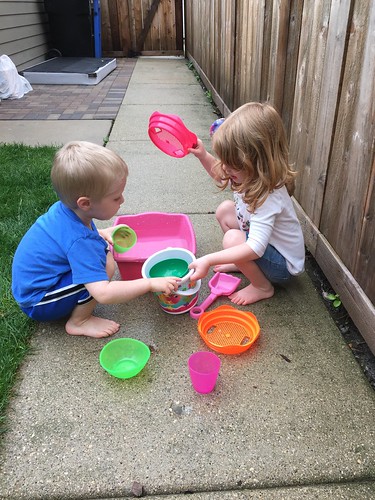
In the middle of this, a huge delivery truck pulled up in our alley and a delivery man maneuvered a pallet full of closet organizing hardware into our garage while the two kids stood transfixed. Their outdoor time ended with them happy, tired, and muddy from head to toe. I carried them inside one by one and plopped them in the shower to hose them down, got them into clean, dry clothes, and made lunch.

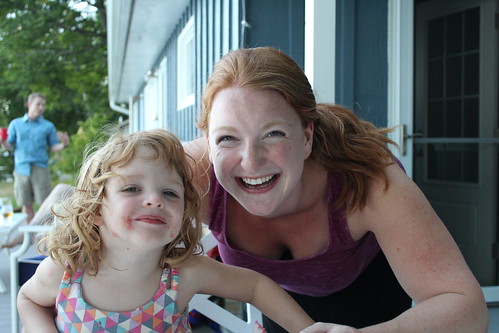
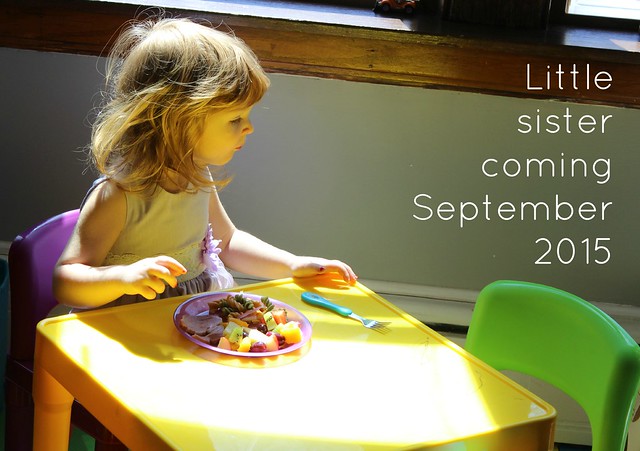
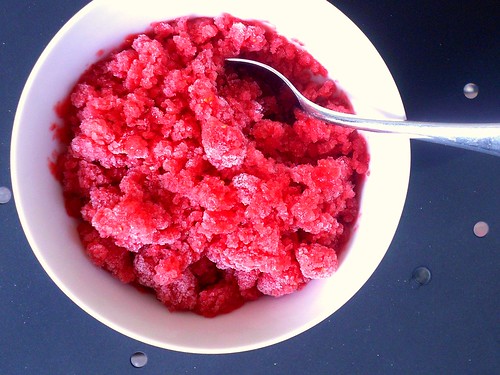
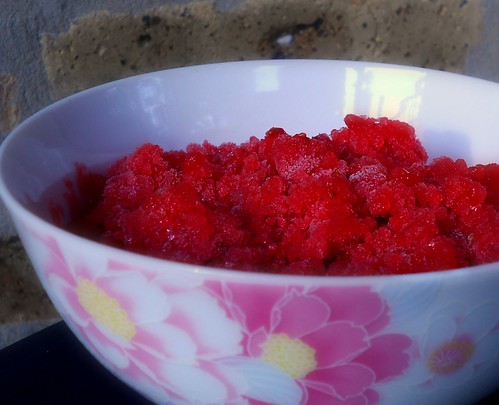
My sister in law stopped by to see the new place, and we had lunch together. The kiddos had chicken nuggets, mac and cheese, and the strawberry-coconut water popsicles we had made in the morning.

After lunch, I set the kids up with a movie and I cleaned up and unpacked a bit. Eleanor went down without protest for another hour-long nap. This may not seem amazing, but she has pretty much exclusively napped in a baby carrier of some kind for her entire life, so I'm not sure how she knows how to sleep alone. I take no responsibility. She's a magic baby.

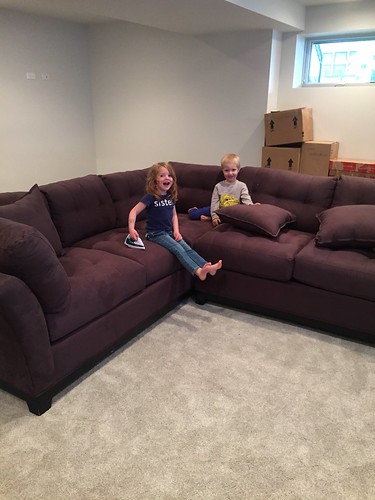
Soon after that, another delivery truck! Another crew of guys unloading and carrying and assembling,  and poof! A couch!!

IMG_8875

IMG_8877

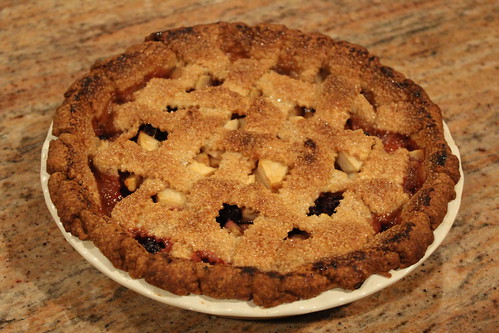
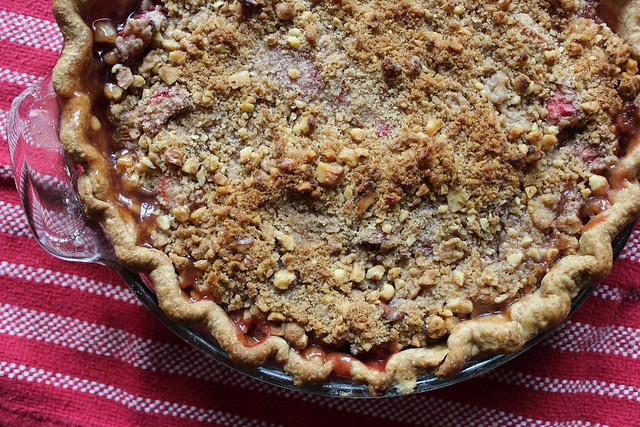
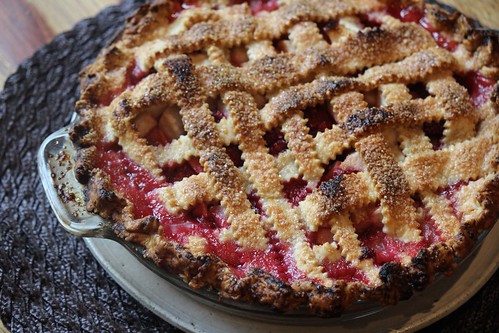
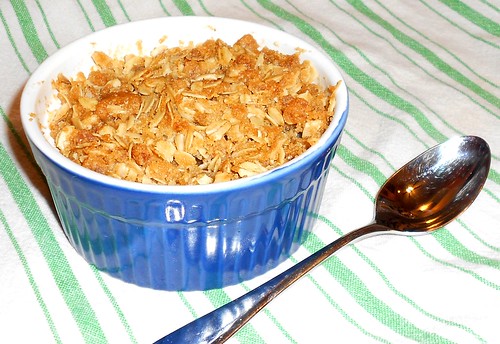
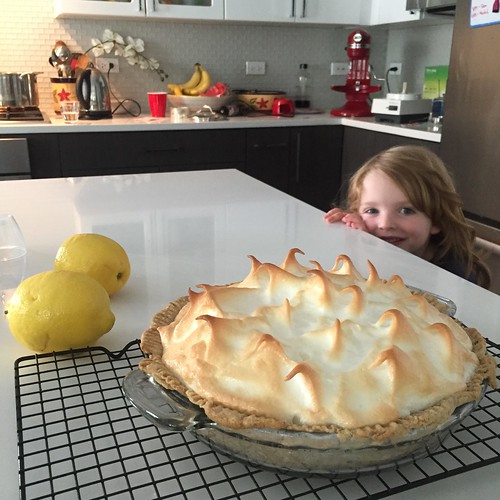
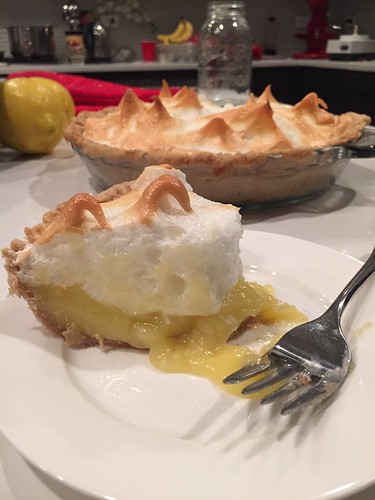
Then, I enlisted the help of my small cohorts in baking a lemon meringue pie, requested by Anne after several readings of Amelia Bedelia. It turned out just right! So beautiful! So GOLDEN, as Anne will tell you. (Recipe here!)

IMG_8879

Jamie got home and as I started to make my way out the door to my dentist appointment, Anne begged to go with me. I told her it would be very boring, but she insisted. As we walked out the door to the car she grabbed my hand, looked up at me and said, "Mamma! We're going on a date!"

Arrived at the dentist, and it occurred to me that as long as Anne was there, and Eleanor wasn't, she might as well get her teeth cleaned too!

IMG_8881

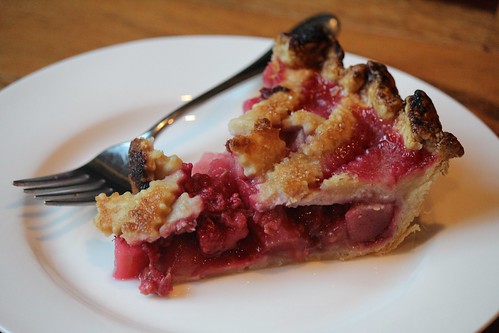
2.5 hours later, all teeth shiny and clean, and me with half my mouth numb from a new filling (thanks to our awesome dentist for the triple dose of novocain. I love you.), Anne and I waltzed back out to the car, called in an order for takeout sushi, picked it up on our way home, and ate our miso soup, edamame, and sushi in the kitchen together, followed by a piece of lemon meringue pie.

IMG_8884

It was just an awesome day. Not for any one specific reason. I think my expectations were appropriately low. I think I said "yes" whenever I could. I think I ate good food and drank enough water, and that I'm a better mom when I'm not hungry or craving sugar. Thank you, Jesus, for days like this. With nothing terribly remarkable in them, but somehow adding up to something spectacular. May my life be the same. A series of good days, where I did my best, enjoyed the people around me, loved, laughed, baked, played outside. Nothing flashy or ostentatious, just a life LIVED.


Wednesday, March 23, 2016

Charoset-Inspired Baked Passover Apples

IMG_3524

It's a feature of my personality, not to want to miss out on anything. I struggle with decisions, because I know that choosing to do one thing means choosing not to do a host of other things. This is especially difficult for me around holiday times, because with little kids around, doing everything is totally impossible. And what's more important? That they have a well-planned craft for each day of Holy Week, or that I remember to take time to sit down and just read the Story with them? To make sure their little minds are absorbing just a little more of the mystery we celebrate this week?

Amid the chaos of extra church services, cleaning, shopping, and redecorating, I'm trying to cultivate calm. I'm reminding myself that family traditions aren't built in one year, but over a lifetime.

One spring, when I was in seventh or eighth grade, our church hosted a Passover seder. It was the first time I had been exposed to beautiful rituals of this ancient Jewish feast, and I was blown away. As we read the questions, ate the symbolic foods, and drank sips of wine, I saw in a totally new way what Jesus had done. How he had fulfilled centuries' worth of prophecy. I was moved and changed.

Every year, I feel a tug to celebrate the Passover like that again, with matzah, bitter herbs, four cups of wine, and the Haggadah to guide us through it. This year, with a 5-month-old and a 3-year-old, though, I decided that all the careful work and planning I would have to complete to make this meal happen would just end up in my frustration over their inability to appreciate it. I'm going to wait. Maybe next year. (Ann Voskamp has a wonderful post about her family's Seder here.)

But instead of giving up on the idea entirely, I made a seder-inspired meal for Palm Sunday dinner. I would have loved to have it on Holy Thursday, in memory of the seder Jesus celebrated with His disciples before He died, but again - elaborate dinner on a weeknight ups my chances of ending up in tears, so I did what I could to keep both this feast and my sanity.

IMG_3517

The menu:

Broiled lamb chops
Pilaf
Greek salad (with lots of parsley)
Baked apples and vanilla ice cream

Charoset is a paste made from apples, nuts, honey or sugar, and red wine, and it's a traditional part of the seder plate; its texture represents the mortar the Israelites used when they were enslaved in Egypt. Here's a traditional recipe.

IMG_3520

Charoset-Inspired Baked Passover Apples

5 Fuji apples, cored
1/2 cup red wine
1/2 cup water
1/3 cup sugar
1 cinnamon stick
1/3 cup brown sugar
1/3 cup finely chopped walnuts
1 teaspoon cinnamon
1 tablespoon butter

Preheat the oven to 375 degrees. Arrange the apples in a baking dish with a lid. Combine the wine, water, sugar, and cinnamon stick in a saucepan over medium heat and stir until sugar is dissolved. Set aside. In a small bowl, mix together brown sugar, walnuts, and cinnamon, and spoon the mixture into the center of the apples. Top each apple with a small piece of butter, right on top of the filling. Pour the wine around the apples, cover, and bake for about 45 minutes, until soft.

Tuesday, September 29, 2015

An Impromptu Michaelmas {Pear + Blackberry Pie}

I didn't have any plans to celebrate Michaelmas this year, because with a 9/28 due date I was frankly hoping to be otherwise occupied. But when this morning rolled around with no labor at all, much less a baby, I decided to throw together an impromptu celebration with some of our best friends. It was so much fun that I was really able to enjoy day #1 of being "overdue," instead of just sitting in my extra-clean and well-nested house twiddling my thumbs and poring over hilarious lists of things to do to get labor started.

Since I had exactly no plans for today, I had all the time in the world to make a big project out of dinner. We had roast chicken, honey-glazed steamed carrots, and green beans. For dessert, a pear and blackberry pie! (Why these foods? Haley has it all laid out for you.)

Michaelmas 2015

Michaelmas 2015

And we put our capes of light to good use for the second year in a row! Stickin' it to the devil, one small person at a time. :-)

Michaelmas 2015

Michaelmas 2015

Michaelmas 2015

There's a beautiful free downloadable version of the St. Michael Prayer on Carolyn's blog today - check it out! Can't wait to see more of her beautiful work, soon to be available via her new Etsy shop, Brass & Mint Co.


Pear + Blackberry Pie

My favorite crust, as always.
5 cups peeled, cored, and chopped pears (1-inch pieces)
2 cups blackberries
zest of 1 lemon
juice of 1/2 lemon
3/4 cup granulated sugar
1/2 teaspoon ground ginger
1/2 teaspoon cinnamon
pinch of kosher salt
2 1/2 tablespoons cornstarch
2 tablespoons milk or cream
coarse sugar for sprinkling

Preheat the oven to 400 degrees. Combine the fruit, lemon zest, and lemon juice in a large bowl. In a small bowl, whisk together the sugar, spices, salt, and cornstarch, and add them to the fruit. Toss together gently.

Roll out half of the pie crust and fit inside a 9- or 10-inch pie plate. Fill with the fruit mixture, and then roll out the second half of the crust and top the pie with a lattice. Brush with milk or cream and sprinkle with sugar. Bake for one hour to one hour and twenty minutes, until the crust is deeply brown and the filling is bubbling. Cool before slicing. Serve with vanilla ice cream!


Sunday, July 26, 2015

Angel Food Cake with Fresh Raspberry Cream {St. Anne Day!}

St. Anne Day 2015 :: coppertopkitchen.blogspot.com

We are up at the lake in Michigan for the last time this summer, our last bout of (planned) family travel before little sister makes her big entrance. Today we celebrated the feast of St. Anne, mother of Mary and grandmother of Jesus, and my oldest girl's namesake! It was an absolutely perfect day, warm and sunny and filled with laughter and family. This was the first time I've remembered Anne's name day was coming up soon enough to plan ahead and make something special for dessert!

Angel Food Cake with Fresh Raspberry Cream :: coppertopkitchen.blogspot.com

Since I'm not at home, I wanted to keep it simple. What is simpler than a cake mix that only requires you to add water? Enter Betty Crocker angel food cake. So delicious, and not perceptibly different from making it from scratch, which requires beating and beating and beating a dozen (a dozen!) egg whites forever.

And you guys, did you know that you can whip cream with a blender? It's not as fluffy as if you whip it in a mixer with a whisk, but it takes approximately 20 seconds, so it works in a pinch! I folded a pint of smashed raspberries and a little bit of sugar into 2 cups of cream, and served it alongside the cake as a topping.

Angel Food Cake with Fresh Raspberry Cream :: coppertopkitchen.blogspot.com

Angel Food Cake with Fresh Raspberry Cream :: coppertopkitchen.blogspot.com

Angel Food Cake with Fresh Raspberry Cream :: coppertopkitchen.blogspot.com

Since I didn't have the proper equipment, and I made a lousy judgment call trying to revive it before serving, mine was a lot more like sauce, where I was originally going for fluffy pink clouds. The taste was still amazing. And it made a certain little girl very happy. :-)

Angel Food Cake with Fresh Raspberry Cream :: coppertopkitchen.blogspot.com

Wednesday, May 20, 2015

Rhubarb Streusel Pie

Rhubarb Streusel Pie :: coppertopkitchen.blogspot.com

This is it. The best rhubarb pie in the world. Did you hear me? THE. BEST. Perfect crust. Tangy-sweet rhubarb flavored with vanilla bean. Crumbly, crunchy, nutty streusel topping. This afternoon I'm planning to make my fourth in a span of two weeks, because if I'm with people, I need them to be eating this pie. And I need to be eating it. I ate almost the whole first one by myself.

I mean, I had help. A little. In the person of a tiny baby girl who is making her presence known more and more each day with kicks and jabs to my abdomen.

Little sister

I'm a late sharer of pregnancy news online. I so love telling people in person and seeing their reactions; hugs and squeals of excitement and actual congratulations are SO MUCH BETTER than Facebook likes and comments. When mostly everyone knows, and it's starting to be visible no matter what, then I finally share the news online. It's a girl, and she's healthy! I'm feeling great.

{Apparently, I like to announce I'm having baby girls by sharing recipes for pink vegetables. Last time, Radish Pickles! And more thoughts about the weighty responsibility of raising girls into women. Head over to check it out.}

Rhubarb season is just warming up in the Midwest, so you have plenty of time to get some reddish pink treasure from the farmers market and make yourself and those you love an amazing pie.

Rhubarb Streusel Pie :: coppertopkitchen.blogspot.com

Rhubarb Streusel Pie

I always, always use Heidi Swanson's pie crust recipe, and it is amazing every time.

Filling:
5 cups (about 2 pounds) fresh rhubarb, chopped into 1-inch pieces
1 cup sugar
1/2 vanilla bean (or 1 teaspoon vanilla extract or vanilla bean paste)
3 tablespoons tapioca starch (corn starch will also work)

Topping:
1/4 cup firmly packed brown sugar
3/4 cup finely chopped walnuts
1/4 cup butter, cut into cubes
3/4 teaspoon cinnamon
1/4 teaspoon salt
1/2 cup flour

Make the crust and refrigerate it until ready to use (making it a day ahead of time breaks up the effort required to make the pie, and ensures the crust is fully chilled - win-win).

Preheat the oven to 450 degrees.

Place the sugar in a small bowl with the vanilla bean (if using), and use your fingertips to rub the sugar along the inside of the vanilla bean, scraping out the seeds and distributing them through the sugar. (You could also do this ahead of time - the vanilla flavor will be more pronounced if you leave the vanilla bean in the sugar for a while.)

Place the chopped rhubarb in a large bowl with the vanilla sugar (or sugar and vanilla extract/paste) and tapioca starch and stir to combine. Set aside for about 15 minutes, while you prepare the crust and topping.

In a small bowl, stir together brown sugar, walnuts, cinnamon, salt and flour. Add the butter, and use your fingers to rub it into the sugar mixture until well-combined.

Roll out the crust and fit it into a pie plate. Decoratively crimp the edges, and pour the rhubarb filling into the crust, being sure to scrape all of the sugar and juice out of the bowl. Sprinkle the topping evenly over the fruit (ahem, vegetable) filling and slide into the oven. Bake at 450 for 15 minutes, then decrease the heat to 350 and continue baking for 50-60 minutes, until the filling is bubbling, and the topping and crust are golden.

Cool at least 2 hours before slicing, and serve with vanilla ice cream.

Friday, September 13, 2013

Pear-Raspberry Pie

Pear-Raspberry Pie | coppertopkitchen.blogspot.com

There's something about a pie. It's homey. Nostalgic. Comforting. The cozy interior of Hoosier Mama Pie Company is tiny: a couple of tables and chairs, an old sea-foam green dresser serving as a checkout counter, and a display case full of pie. But it's where I want to go when my spirits need lifting. I made my husband take me there after some careless knife handling necessitated a trip to the emergency room a few years ago. I sat there with my mom, sharing buttery pie and hot coffee after I found out I had lost a baby, only 8 weeks into my first pregnancy, almost exactly two years ago.

Paula Haney's new cookbook, The Hoosier Mama Book of Pie, is a veritable encyclopedia of pie knowledge. Step-by-step photos of important, hard-to-describe processes (pie crust, anyone?), funny stories, and page after page of fantastic recipes. Pear-raspberry was the first one to jump out at me, because the window for both fruits at the farmers market is happening right now. I know it won't come as a shock to you that I love to cook, and that time in the kitchen is relaxing and very rewarding for me, but making a pie is a special sort of culinary meditation. Mix the dough. Wait. Roll out the dough and shape it into a crust. Peel and slice the fruit. Toss. Wait. Bake for a long time. Wait. Wait. Slice and eat. It's almost a full day from start to finish, and so worth it. Every step is magic. And then, of course, there's pie for breakfast the next day: one of the highest pleasures in this life.

Pear-Raspberry Pie | coppertopkitchen.blogspot.com

Pear-Raspberry Pie

from The Hoosier Mama Book of Pie


Make sure to use soft, really ripe pears. I didn't, and while the flavor was still amazing, the pears were a little crunchy. This recipe is printed as is from the cookbook. I'm not going to print any other recipes from this book, and I'm not including the crust recipe, because I think you should just go buy it. It's awesome. Go.

1 9-inch double-crust pie dough (preferably from page 24 of the cookbook linked above)
5 cups ripe pears, peeled, cored, and chopped into bite-size pieces
2 cups raspberries
1 tablespoon fresh lemon juice
3/4 cup granulated sugar
2 1/2 tablespoons cornstarch
1/4 teaspoon ground ginger
pinch kosher salt

Place the pears, raspberries, and lemon juice in a medium bowl. Do not mix. Place the sugar, cornstarch, ginger, and salt in a small bowl and whisk until thoroughly combined. Gently fold the dry ingredients into the fruit, until most of the mixture is absorbed. Take care not to break up the raspberries. Sprinkle Crust Dust (a mixture of equal parts flour and sugar, designed to absorb some of the fruit juice and ensure a not-soggy bottom crust) into the empty pie shell. Pile the fruit into the shell and smooth the top with a spatula. Finish the pie with a lattice top, and freeze for at least 20 minutes.

Preheat the oven to 400 degrees. Brush the lattice with Pie Wash (equal parts cream and whole milk) - be amazed at how easily you can brush a slightly frozen pie crust without smashing it - and sprinkle liberally with coarse-grained sugar. Bake for 60-80 minutes, rotating 180 degrees every 20 minutes, until the crust is dark golden brown and the juices are bubbling thickly. Cool for at least 2 hours before slicing.

Wednesday, March 27, 2013

Coconut-Lime Macaroon Nests

image

The calendar said it was spring a week ago, and I'm starting to believe it. Yesterday Anne and I went for a walk, and when the sun came out from behind the clouds and the wind stopped blowing for a second, it was too hot for my big coat. Daffodils and tulips are poking their leaves through the ground, and I saw a whole row of fully-bloomed purple crocus. The birds are chirping! My seedlings are really growing; most of them have sprouted their second set of leaves (the first set of true leaves!), and I'm going to have to start thinning and repotting them already; more about that later! I can't believe how fast they're growing!

image

These little macaroon nests are perfect for Passover and Easter; cute enough to please the littles (if their baskets full of peeps and chocolate bunnies aren't enough), not too sweet, and subtly flavored.

Happy Spring!

Coconut-Lime Macaroon Nests

Adapted from Bon Appétit

2 egg whites
1/4 cup sugar
1/4 teaspoon kosher salt
1 tablespoon lime zest
7 ounces (about 3.5 cups) coconut flakes/chips, available at Whole Foods or similar stores

Preheat the oven to 325 degrees and line two baking sheets with parchment paper. In a large bowl, whip the egg whites and sugar until frothy. Whisk in the salt and lime zest and add the coconut flakes. Toss to coat. Scoop the coconut mixture in heaping tablespoonfuls onto the prepared baking sheets, making your best attempt to shape them into nests; they're not very cooperative. Bake for 18-20 minutes, until golden brown. Allow to cool on the baking sheets, and when they're cool, arrange whatever "eggs" you like on top. I used peanut butter M&Ms, but those little Whoppers robin eggs would be great, or jelly beans, or any of the other myriad egg-shaped tiny candies available at your nearest sweets emporium (aka Target).

Wednesday, August 15, 2012

Peach Cobbler

Peach Cobbler 1

It seems that every region has their produce pride on during the summer - the best, most flavorful (fill in the blank) can only be found in MY hometown. The only (apples, cherries, peaches) worth eating are from MY state, MY region. I kind of love it! It feels old-timey and sweet that people so fiercely defend their perfect fruits and veggies. The South Carolina peach! The Washington apple! The Maine blueberry! The Traverse City cherry! It puts me in mind of state fairs and blue ribbon heirloom tomatoes, and I like that.

Peach Cobbler 3

I have had the good fortune of tasting peaches from the Midwest, Southeast, and Southwest this summer, due to summer travel and generous, peach-toting friends. I must say that every peach is a poem in itself, and I usually just stuff my face full of as many as possible, not pausing to criticize. Juice dripping all over my hands and face, I am happy. And because they're so insanely delicious totally naked, I tend to do as little as possible when cooking with them. Such is the case with this cobbler: a touch of sugar and cornstarch, a simple drop biscuit on top, a bit of loosely whipped cream, and I am in peach heaven.

Peach Cobbler 2

Peach Cobbler

about 4 pounds fresh peaches, pitted and sliced into 1/4- to 1/2-inch wedges
1/4 cup brown sugar
1/4 cup white sugar
1 tablespoon cornstarch

Topping:
2 cups all purpose flour
1 cup sugar
2 teaspoons baking powder
1 teaspoon salt
12 tablespoons cold unsalted butter, cut into small pieces
1/2 cup boiling water

Preheat oven to 425 degrees. Toss peaches, sugar, and cornstarch together in a 9x13 baking dish, and bake for 10 minutes. In the meantime, prepare the topping. Stir together flour, sugar, baking powder, and salt in a medium bowl. Using your fingers, work the butter into the flour mixture until it resembles fresh bread crumbs. Pour the boiling water in, and working quickly with a wooden spoon, stir together until it forms a soft dough. Scatter pieces of dough over the hot peaches, sprinkle the top with more sugar, and bake until golden and bubbling, about 25 minutes. Serve warm.


Thursday, July 19, 2012

Strawberry Hibiscus Granita

strawberry hibiscus granita 2

It has been so. HOT. Unrelenting! Go outside to water the plants and come in sweating hot. 80 degrees at 7 in the morning hot. The subway station feels like the bowels of hell kind of hot.

Ice for dessert! Perfect.

I know I'm a little late to the strawberry game, but even if you can't find local strawberries anymore, you should still be able to make a rather respectable granita out of berries from the supermarket. Or improvise! Blackberries, blueberries, and raspberries - even sweet cherries - would make a fantastic substitute.

strawberry hibiscus granita

Strawberry Hibiscus Granita

adapted from Bon Appetit

4 hibiscus tea bags (I used Tazo Passion)
1 pound strawberries, hulled and quartered
1/2 cup agave nectar
juice of one lime

Steep the tea bags in 1.5 cups boiling water for about 2 minutes. Remove tea bags and chill tea until cold, about an hour. Blend strawberries in a blender until pureed, add chilled tea, agave nectar, and lime juice, and whirl for another second in the blender until just combined. Pour strawberry mixture into a 9x13x2 pan and place carefully in the freezer. Freeze for 2 hours, until a hard top layer forms, and then scrape and smash with a fork to loosen the ice crystals. Freeze another 30 minutes and scrape again, repeating every 30 minutes for about 2 more hours, until fluffy and frozen through. Divide among bowls and serve.

Thursday, May 3, 2012

Pear Crisp for One

Spring 2012 117

Before long, peach and berry season will be here, but now the fruit that's available is still apples and pears.  They may be looking a bit tired, and they've lost the novelty they held in the late fall. But chopped up and tossed with sugar and spice, topped with oats and crystallized ginger, and baked, they're still hitting the spot for me.

Pear crisp topping!

What seasonal fruit or vegetable are you most looking forward to this spring?

Pear Crisp for One

Pear Crisp for One

1 pear, peeled, cored, and cubed
1 tablespoon flour
1/4 teaspoon cinnamon
pinch nutmeg
1 tablespoon sugar
1 teaspoon fresh lemon juice
1 tablespoon cold unsalted butter, cut into small pieces

For the topping:
1/4 cup old-fashioned rolled oats
2 tablespoons flour
1 teaspoon finely minced crystallized ginger
1/4 teaspoon cinnamon
pinch nutmeg
2 tablespoons brown sugar
2 tablespoons melted butter

Preheat oven to 350 degrees and butter an 8-ounce ramekin. In a small bowl, toss pears, flour, cinnamon, nutmeg, sugar, and lemon juice together. Place mixture into the ramekin and dot the top with the cold butter. In another small bowl, combine oats, flour, ginger, cinnamon, nutmeg, brown sugar, and melted butter, and stir together until it's crumbly but starting to hold together. Sprinkle oat mixture on top of pears, and bake for 25-30 minutes, until pears are tender and topping is crispy and golden. Top with a scoop of vanilla ice cream.


Monday, April 23, 2012

Tropical Fruit Pavlova + Our Lady of the Angels

Last week, as I participated in the rededication of the church at the Mission of Our Lady of the Angels in West Humboldt Park, I was reminded that the Resurrection is not a one-time event. I didn’t even know that the mission existed until mid-March, when I went with a group from my church to help out with their monthly mobile food pantry. The story of this place takes my breath away.

Spring 2012 189

Our Lady of the Angels used to be a thriving parish in a largely Italian-American neighborhood. In 1958, a devastating fire in the parish school killed 92 students and 3 nuns and injured many others. The school was rebuilt and reopened in 1960, but closed as a result of declining numbers in 1999. The parish closed in 1990. The demographics of the area have changed drastically since the time of the school fire; today it remains an area of poverty, gang activity, and violent crime. In 2006, the median household income in the area was $21,000, and 35 percent of adults did not have a high school diploma.

Mission OLA

In 2004, Fr. Bob Lombardo answered Cardinal George's call to rebuild the church in this depressed Chicago neighborhood. When he arrived, many of the buildings were vacant or in disrepair. With virtually no budget to make repairs, Fr. Bob relied on the help of neighbors and friends to donate time, money, skills and prayer to rebuild this mission. The state of the mission today is a testament to Fr. Bob’s great faith and tireless work, and to the reviving power of God.

In 2006, the Franciscan mission opened in the completely renovated rectory. Kelly Hall, which had been the vacant and crumbling parish center, reopened in January 2009 as a fully renovated YMCA community center. The convent has been beautifully renovated, and now serves as a facility for retreats and other community gatherings. The Franciscans of the Eucharist, a fledgling religious community, began serving the mission in 2009. Today, the mission helps about 700 families each month to get good, healthy food. About 130 children participate in the after school program, and several hundred are involved in activities and programs at Kelly Hall.

That's a lot of beans!

The most recent project was the church, which completed renovations and was rededicated on April 14, 2012. The church was packed with people who had come to celebrate the remarkable resurrection story that has occurred in this place. There was such joy! And they didn’t pause their community outreach for the celebration, either: the day of the rededication, they held their monthly mobile food pantry, hosted a Daddy-Daughter Dance at Kelly Hall, and then served a fabulous dinner to all the guests at the Mass.

Mission OLA1

For more information about Fr. Bob and the Mission of Our Lady of the Angels, visit their website, www.missionola.com, where you can learn about their many volunteer opportunities, donate money to support them, and view lots of pictures of volunteers and community members, and amazing before-and-afters of their ongoing renovations.

Tropical Fruit Pavlova

Tropical Fruit Pavlova

Pavlova is simple and elegant, and a perfect dessert for Easter, Mother's Day, or any other springtime gathering. Swap out the tropical fruit for berries in the summer. Also, I've heard it described as a symbol of the resurrection, since it spends 2 hours resting in the "tomb" (the oven that has been turned off) before it's done. A bit of a stretch, but kind of cute, right?

adapted from Cook's Illustrated

Meringues and Fruit:
4 large egg whites
3/4 teaspoon vanilla extract
1/4 teaspoon cream of tartar
1 cup plus 1 tablespoon sugar
1 mango, peeled, pitted, and cut into 1/4-inch pieces
2 kiwis, peeled, quartered, and sliced thin
1 1/2 cups pineapple, cut into 1/2-inch pieces

Topping:
1 cup heavy cream
1/2 cup sour cream
1 tablespoon sugar
1 teaspoon vanilla extract

For the meringues: adjust oven rack to middle position and heat oven to 200 degrees. Line baking sheet with parchment paper.

Using stand mixer fitted with whisk, whip egg whites, vanilla, and cream of tartar on medium-low speed until foamy, about 1 minute. Increase speed to medium-high and whip whites to soft, billowy mounds, about 1 minute. Gradually add 1 cup sugar and whip until glossy, stiff peaks form, 1 to 2 minutes.

Scoop six 1/2-cup mounds of meringue onto prepared sheet, spacing them about 1 inch apart.  Gently make small indentations in each meringue using back of spoon. It will be really sticky, so just do the best you can.Bake until meringues have smooth, dry, and firm exteriors, about 1 1/2 hours. Turn oven off and leave meringues in oven until completely dry and hard, about 2 hours. (Meringue shells can be stored at room temperature for up to 2 weeks.)

For the fruit: Gently toss mango, kiwis, and pineapple with remaining 1 tablespoon sugar in large bowl. Let sit at room temperature until sugar has dissolved and fruit is juicy, about 30 minutes.

For the topping: Using stand mixer fitted with whisk, whip heavy cream, sour cream, sugar, and vanilla on medium-low speed until foamy, about 1 minute. Increase speed to high and whip until soft peaks form, 1 to 3 minutes.

To assemble, place meringue shells on individual plates and spoon about 1/3 whipped cream into each shell. top with about 1/2 cup fruit. Serve immediately.


Wednesday, February 15, 2012

Pears in Red Wine

This year, my valentine brought me a vase of red tulips and two round red pears.

Winter 2012 290

When we were in Boston last fall, I picked up a lovely little cookbook called "Roast Figs Sugar Snow," by Diana Henry. It's filled with beautiful photos, romantic descriptions of wintertime ingredients, and brilliant, comforting recipes from the world's colder climes, this is truly a cookbook to curl up with and enjoy.

"The glory of cooked pears is that the spoon still meets resistance as it slices the flesh, unctuous and satisfying, cutting through the network of softened membranes and fibers. And how that flesh absorbs the flavors around it! That much-derided dish of garnet beauties, pears in red wine, when cooked properly - slowly, then left to sit around in its syrup to intensify both flavor and color - is unrivaled in its capacity to be simple and luscious."  YES.

Winter 2012 293

Winter 2012 298

Pears in Red Wine

2 firm pears, peeled, halved and cored
scant 1/2 cup granulated sugar
1 cup red wine
1 cinnamon stick

Combine the sugar, wine, and cinnamon in a medium saucepan over medium-high heat. Bring to a boil. Gently place the pears into the wine mixture, and dial back the flame to medium-low. Cover and simmer for ten minutes, turning the pears over halfway through cooking time. Remove from heat and allow to sit in the syrup for at least 20 minutes, or up to a few hours, turning periodically and spooning syrup over the pears. Serve warm or at room temperature by themselves, or with a scoop of vanilla ice cream and/or a drizzle of chocolate sauce.

Wednesday, November 16, 2011

Southern Comfort Apple Pie and Thoughts about Crust

T-MINUS ONE WEEK UNTIL TURKEY DAY!

Are you ready?


Up until very recently, I had experienced nothing but failure when I tried to make pie crust on my own.  Oh, I could cobble together something moderately respectable, but I would never have called it a success.  So when my mom came to visit this summer, I dragged her to the kitchen to show me exactly how it's done.

There are a lot of different opinions floating around out there about pies.  Butter, lard, or vegetable shortening?  A combination?  Food processor, pastry blender, or by hand?

Here are my conclusions, based on a couple of months of research:

FATS:
Butter is best for flavor, but the crust does not hold shape as well as a combination butter-shortening crust.  Read this article for a full run-down on the pros and cons of different fats (and, incidentally, a step-by-step photo recipe of my preferred method for making dough).

METHOD:
I like the food-processor method.  It's consistent, it's easy, and it's fast.  If you want to do it by hand, there's a great tutorial over here.  I love the idea of doing it by hand.  I really do.  And I may change my mind in the future, but for now, this method is really working for me.

OTHER INGREDIENTS:
When I was baking test pies for the Bucktown Apple Pie Contest, I had this idea in my head that I should bake something extra-special into the crust.  I blame Pushing Daisies for putting a bee in my bonnet.


I tried baking in a little maple syrup, a little lemon zest, honey...  And none of them worked.  Pie dough is a very delicate balance, and you can't just throw extra things in.  The one exception I've found is Heidi's rye pie dough, which is hands-down the dreamiest, easiest-to-handle, flakiest, most amazing pie crust I've ever made or tasted.


The key ingredient, I've found, is patience.  Don't cut corners, don't rush, and you'll come out the other side with a buttery, golden pie crust you can be proud of.

Southern Comfort Apple Pie
adapted from 20 Something Cupcakes

It's important that you use a deep-dish pie plate for this recipe, because the caramel filling expands while baking, and you really, really don't want hot sticky stuff bubbling out of the pan onto your oven.  I baked my pie on a cookie sheet just in case, and my pie plate is ginormous.

Basic All-Butter Pie Crust:
This recipe makes enough for one 8- or 9-inch double-crust pie, two single-crust pies, or one 10-inch deep-dish single-crust pie.

2 cups all-purpose flour
1 teaspoon kosher salt
3/4 cup very cold unsalted butter, cut into cubes
1 tablespoon apple cider vinegar
4-5 tablespoons ice water

Place flour and salt in a food processor with the blade attachment.  Pulse a few times.  Place half of butter cubes into food processor and pulse a few times, until pea-sized clumps form.  Add the rest of the butter, and pulse only two or three times, just to break it up a little and coat it with flour.  The next step will take care of the bigger pieces.  Add apple cider vinegar and water, one tablespoon at a time, pulsing a few times after each addition, and stopping the moment the dough starts to come together.  If it gets too wet, it's impossible to work with, and really hard to fix.  Dump the dough out onto a piece of plastic wrap, squeeze into a disc (or two, for two crusts), wrap tightly, and let rest in the refrigerator at least 30 minutes.  All day is fine - the colder it is, the easier it is to roll out.

Topping:

1/2 cup pecan halves, roughly chopped
1/3 cup sugar
3 tablespoons firmly packed brown sugar
1/2 teaspoon cinnamon
1/4 teaspoon salt
1/3 cup all-purpose flour
1/2 cup chilled unsalted butter

Place sugars, cinnamon, salt and flour into a food processor fitted with the blade attachment.  Pulse a few times until well incorporated.  Add butter and pulse a few times more, until uniform small-ish pieces form.  Remove to a bowl and stir in pecans. Set aside.

Filling:

5-7 medium-size baking apples, such as Cortland
1/2 cup unsalted butter
1 tablespoon cinnamon
1/2 teaspoon nutmeg
1 cup sugar
3/4 cup Southern Comfort liqueur

Preheat oven to 375 degrees.  Peel and core the apples, and slice into 1/4-inch thick slices.  In a large skillet, melt 1/2 cup butter over medium heat.  Add apples, and saute for about 5 minutes.  Add sugar, cinnamon, and nutmeg, stirring to combine.  Using a slotted spoon, remove apples to a baking sheet, leaving as much liquid as possible.  Add Southern Comfort to the skillet, and cook about 10 minutes, until alcohol is burned off and mixture is thick.  Remove from heat and return the apples to the skillet, stirring to coat.  Roll out pie crust to a 1/8-inch thick circle, and place gently in pie plate.  Flute edges and prick all around bottom and sides with a fork.  Pour apple filling into prepared crust, leaving 1/2 inch of headspace at the top.  Sprinkle with pecan topping, and bake 50-60 minutes, until filling is bubbling and topping is crisp and brown.

Serve with unsweetened whipped cream.


Friday, September 2, 2011

Chocolate Raspberry Cheesecake


I thought about making a different cake for my hubby's birthday this year.  I found a recipe for a chocolate layer cake with pink raspberry buttercream frosting and chocolate ganache that was just calling out to me.  But the suggestion that I might be making a different cake (but maintaining the chocolate and raspberry elements) was met by heartfelt disapproval by the birthday boy, so I scrapped my delicious pink plan and stuck with what I knew.


It was the right thing to do.  Why mess with perfection?

Chocolate Raspberry Cheesecake

For the crust:
1.5 cups chocolate wafer crumbs
3 tablespoons sugar
3 tablespoons melted butter

For the filling:
2.5 8-ounce packages cream cheese (Neufchatel works perfectly)
1 cup sugar
1.5 teaspoons vanilla extract
1 vanilla bean, seeds scraped and reserved (or 1 teaspoon vanilla bean paste)
3 tablespoons flour
3 eggs
1 cup sour cream
8 ounces melted semisweet chocolate

Preheat oven to 350 degrees.  Lightly grease bottom and sides of a 9-inch springform pan.  Mix cookie crumbs, 3 tablespoons sugar, and butter and press into bottom and sides of pan.  Beat cream cheese, sugar, vanilla extract and vanilla bean seeds in an electric stand mixer until light and creamy.  Add flour and mix.  Add chocolate and sour cream and beat until well blended.  Add eggs one at a time, mixing on low speed until well incorporated after each addition.  Pour into pan and bake 1 hour to 1 hour and ten minutes, until center is almost set.  Run a sharp knife around rim of pan and allow to cool on wire rack before removing rim.  Refrigerate at least 4 hours.

Don't worry if there are a couple of small cracks in the top - it will taste so good nobody will be able to see anything anyway.  And you'll put some homemade raspberry jam on top to complete the magic experience, which will fill in any possible cracks!

For the raspberry topping:
2 pints fresh raspberries, rinsed
1 tablespoon lemon juice
1/2 cup sugar
3 tablespoons corn starch

Stir all ingredients together in a small saucepan, and cook over low heat 15-20 minutes until thickened.  Transfer to a bowl, cover with plastic wrap and cool completely.