Showing posts with label cake. Show all posts

Sunday, July 26, 2015

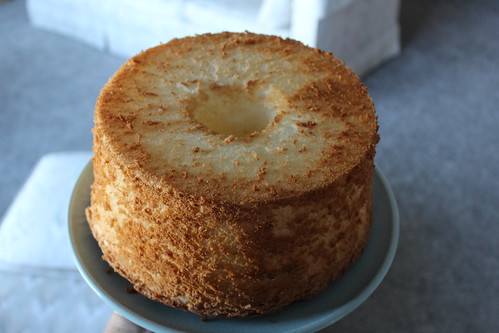
Angel Food Cake with Fresh Raspberry Cream {St. Anne Day!}

St. Anne Day 2015 :: coppertopkitchen.blogspot.com

We are up at the lake in Michigan for the last time this summer, our last bout of (planned) family travel before little sister makes her big entrance. Today we celebrated the feast of St. Anne, mother of Mary and grandmother of Jesus, and my oldest girl's namesake! It was an absolutely perfect day, warm and sunny and filled with laughter and family. This was the first time I've remembered Anne's name day was coming up soon enough to plan ahead and make something special for dessert!

Angel Food Cake with Fresh Raspberry Cream :: coppertopkitchen.blogspot.com

Since I'm not at home, I wanted to keep it simple. What is simpler than a cake mix that only requires you to add water? Enter Betty Crocker angel food cake. So delicious, and not perceptibly different from making it from scratch, which requires beating and beating and beating a dozen (a dozen!) egg whites forever.

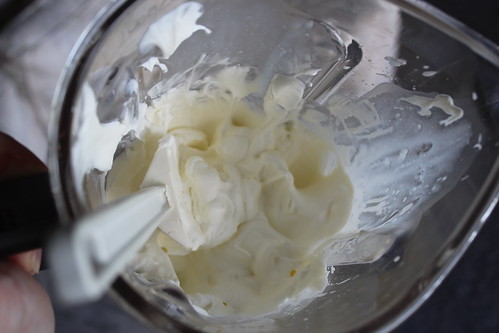
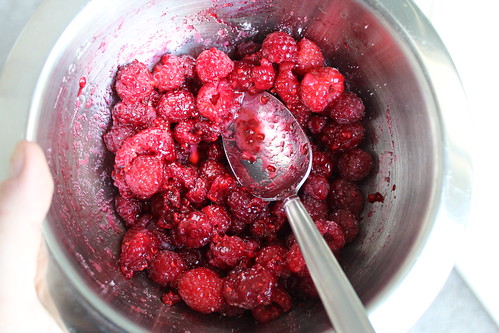
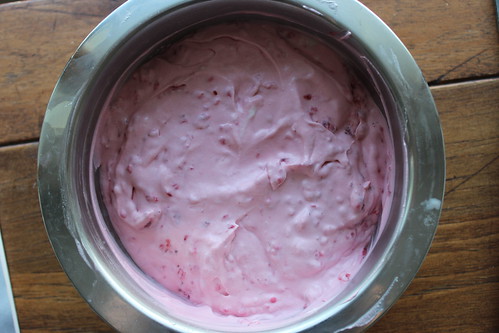
And you guys, did you know that you can whip cream with a blender? It's not as fluffy as if you whip it in a mixer with a whisk, but it takes approximately 20 seconds, so it works in a pinch! I folded a pint of smashed raspberries and a little bit of sugar into 2 cups of cream, and served it alongside the cake as a topping.

Angel Food Cake with Fresh Raspberry Cream :: coppertopkitchen.blogspot.com

Angel Food Cake with Fresh Raspberry Cream :: coppertopkitchen.blogspot.com

Angel Food Cake with Fresh Raspberry Cream :: coppertopkitchen.blogspot.com

Since I didn't have the proper equipment, and I made a lousy judgment call trying to revive it before serving, mine was a lot more like sauce, where I was originally going for fluffy pink clouds. The taste was still amazing. And it made a certain little girl very happy. :-)

Angel Food Cake with Fresh Raspberry Cream :: coppertopkitchen.blogspot.com

Monday, March 16, 2015

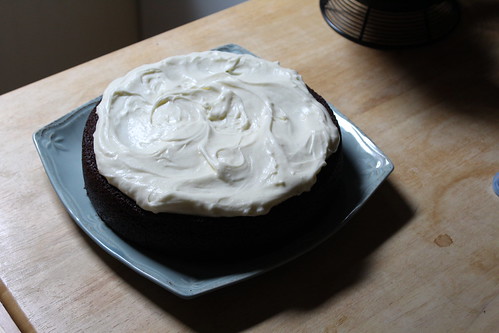
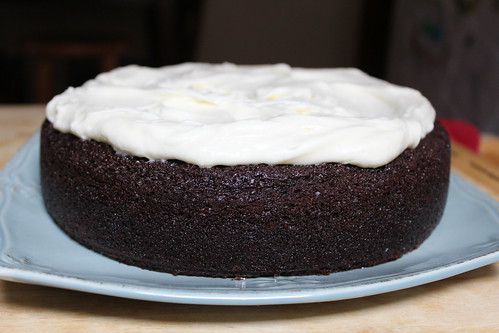
Guinness Chocolate Cake

Guinness Chocolate Cake :: coppertopkitchen.blogspot.com

Laetare! With three weeks left until Easter, we get a little taste of rejoicing, like a runner eating one of those sugary gel packs during a race, to give them a boost toward the finish. We also, handily, got a little taste of spring weather to get us through whatever the late-winter lion is going to throw at us. All the snow has melted in Chicago (miracle!), and GREEN THINGS ARE GROWING OUT OF THE GROUND. Toddlers are getting reacquainted with things like fresh air and dirt. The world is a nice place to be in again.

This weekend we were privileged to be part of the baptism of our friends' brand-new baby son, and I thought how right the timing felt - another little taste of joy this weekend, along with a renewal of the promises we made at our own baptism. Do you reject Satan? YES! Do you believe in God? YES!

IMG_0761

We also brought some dinner over to other friends who just had a baby. I gave them really overcooked corned beef and cabbage! Aren't I nice? I felt bad until I realized I also brought cake. See? That's why you bring cake! Even better if it's dark, dense, beer-infused chocolate cake with cream cheese frosting. I like how the frosting looks (like the frothy head of a pint), but I think I prefer the cake without. It's just so moist and perfect on its own!

Guinness Chocolate Cake :: coppertopkitchen.blogspot.com

Guinness Chocolate Cake

(12 servings)

For the cake:

1 cup Guinness
1 cup (16 tablespoons) unsalted butter, cut into small slices
3/4 unsweetened cocoa powder
2 cups sugar
2/3 cup sour cream
2 eggs
1 tablespoon vanilla extract
2 cups flour
2 1/2 teaspoons baking soda

For the frosting:

8 ounces cream cheese
1 1/4 cups powdered sugar
1/2 cup heavy cream

Preheat oven to 350 degrees. Butter a 9-inch springform pan, line with parchment paper, and butter the paper.

In a wide, shallow saucepan over medium heat, heat up the beer and butter until the butter melts. Remove from heat and stir in the cocoa powder and sugar. In a separate bowl, whisk together sour cream, eggs, and vanilla until smooth; add to beer mixture and whisk to combine. Add the flour and baking soda and whisk until incorporated. Pour into the prepared pan and bake 45-60 minutes, until the cake springs back when lightly touched, and the sides are beginning to come away from the pan.

Allow to cool completely before removing from the pan. While the cake cools, make the frosting. Whip the cream cheese until smooth, then add the sugar. Whip to combine, and then add the cream and whip again until fluffy and spreadable. When the cake is completely cool, remove it to a cake plate, and top with the frosting. The white topping resembles the frothy head on a pint of Guinness. Sláinte!

Friday, May 10, 2013

Carrot Pineapple Cake with Cream Cheese Frosting

It's been a week of firsts: Anne's first time on a plane, first time attending a wedding (congrats, James and Julia!!), first visit to the farmers' market. Yesterday she turned six months old, and it was as if she thought, "I am six months old now, and it is high time I started sitting up unassisted like a big girl." You'd think I would get used to the overlapping and constant milestones, but I just can't seem to catch my breath! Every new thing she does is amazing.

Carrot Pineapple Half Birthday Cake! | coppertopkitchen.blogspot.com

Last night, we had friends over for pizza and half-birthday cake. Sadly, the guest of honor is still working on her purees, and won't be eating any cake for another six months, but we thoroughly enjoyed celebrating on her behalf. (I have the burned finger and shattered pizza stone to prove it; did you know you're not supposed to put a pizza stone under the broiler?)

Carrot Pineapple Half Birthday Cake! | coppertopkitchen.blogspot.com

I've started Weight Watchers again. Five years ago, I lost about 20 pounds on the program, and have since gained it all back (oh hey, baby weight). I thought that since I'm still nursing, and I've been working out with Jillian a few times a week (and trying to get to yoga once a week), that the weight would just continue to fall off. But I had reached a plateau, and I wanted to be more intentional. I share this here only because it's the only way I've ever been successful at losing weight, because I can enjoy the above-mentioned pizza, cake, and beer (oh, I didn't mention that?) without any adverse effects by balancing those choices throughout the day. It just helps to have a portion-control guide. Anyway, in case you're wondering, this cake is 15 points per slice, and I enjoyed every little bite.

Carrot Pineapple Half Birthday Cake! | coppertopkitchen.blogspot.com

Carrot Pineapple Cake with Cream Cheese Frosting

adapted from Great Cakes

This is a half-cake for a half-birthday. For a regular two-layer cake, double everything, and fill and frost as usual.

For the cake:

1 cup flour
1 teaspoon baking soda
1/4 teaspoon salt
1 teaspoon cinnamon
1/4 teaspoon nutmeg
2 large eggs
3/4 cup sugar
1/2 teaspoon vanilla extract
1/2 teaspoon grated lemon zest
1 cup finely chopped fresh pineapple (about 1/4 pineapple), or well-drained canned crushed pineapple
1.5 cups grated carrot (about 3 medium-large carrots)
1/2 cup vegetable oil

For the frosting:

1/3 cup unsalted butter, at room temperature
1 8-ounce package cream cheese, at room temperature
1/2 teaspoon grated lemon zest
1.5 cups powdered sugar
1 tablespoon sour cream
1/2 teaspoon vanilla extract
pecan halves, for garnish (optional)

Preheat the oven to 350 degrees. Butter or coat liberally with coconut oil cooking spray one 9-inch round cake pan. Combine flour, baking soda, salt, and spices in a bowl, and toss together. Set aside. Place the eggs in the bowl of a stand mixer, and using the whip attachment, beat on medium-high for about two minutes, until light yellow, thick, and smooth. Slowly add the sugar, beating for about 5-6 minutes until well blended and fluffy. Add vanilla and lemon zest, and stir. With the mixer running, slowly pour in the oil, and then beat for one minute.

With the mixer off, add the flour mixture all at once, and then mix on low just until incorporated, about 15 seconds. Remove the bowl from the mixer and use a spatula to fold in the carrots and pineapple. Pour the batter into the prepared pan, and bake about 30-35 minutes, until the sides pull away from the pan and a tester inserted in the center comes out clean.

Cool completely. Remove the cake from the pan and cut in right down the middle. Wrap the halves in plastic and place them in the freezer for at least an hour or two, or up to a few weeks (see Deb for awesome tips on fancy cakes). This step is optional, but since you are applying frosting to the inside of the cake (the cut side), freezing will help the frosting stay crumb-free. Make sure that you leave enough time for the frozen cake to come to room temperature before serving.

Make the frosting: In a medium bowl, combine the butter and cream cheese. Use a wooden spoon to cream until very smooth. Mix in the lemon zest. Add half the powdered sugar, then the sour cream, then the other half of the powdered sugar, stirring well after each addition. Stir in the vanilla.

Fill and frost the stacked halves just as you would a whole cake, and garnish with a half-circle of pecans; now you have an adorable half-cake!

Yield: 8 slices

Monday, January 21, 2013

Radicchio Almond Carrot Cake with Orange Mascarpone Whipped Cream + Life Lessons from Childbirth

Radicchio Carrot Cake

This weekend I was able to slip away for a couple of hours to take a spin class, my first real workout since Anne was born. As I settled into the bike seat and started pedaling, my brain started whining even louder than the deafening music in the studio. After about 20 minutes of "Ugh, this is terrible. It hurts. I forgot how uncomfortable these bike seats are. Ow, my legs! I hate this! It's only been TEN minutes? I'll never survive!" this thought finally occurred to me:

Lady, you had a BABY 10 weeks ago. Without drugs. This is NOTHING.

After that, I had a lot more fun.

image

A couple of months before Anne was due, we took a birth preparation class called Birthing From Within (I highly recommend it: if you're in the Chicago area, look up Holly. If not, the book is great, too!). Little did I know how much the lessons learned in that class, and from my own experience of birth, would come in so handy in other areas of my life.

Life Lesson #1: You can do anything for one minute (or one hour, or one day...).

Especially helpful during labor, when there are regularly spaced intervals of pain and rest, is the thought that each contraction will only last for 60-90 seconds, and that at the most, labor only lasts for one to two days. That's it! I have used this one so often, to help me when I had a difficult day of nursing, when I was completely exhausted, to get through 10 days away from home in December (not easy with a newborn!). When something is challenging or painful, the knowledge that it won't be that way forever is very freeing.

Life Lesson #2: Coping with pain through detached awareness + refocused energy.

Ow, it hurts! There's not much power in that, is there? What if you notice and try to describe it? Where is the center of the pain? Where are the edges? In our first week at home, I was exhausted, and it felt like I was on a never-ending hamster wheel of waking, sleeping, nursing, and changing diapers. When you can't count on a full night of sleep anymore, your day no longer starts at 6am and ends at 10pm. So where are the boundaries? It helped me so much to start thinking of my days as a 24-hour block that reset at 7am. That way, if it had been a rough night, we got to start over. And if it was a great night, I wasn't tempted to skip taking a nap while Anne did, because I was preparing for the unknown night ahead. It made a huge difference, and all I did was change how I thought about the day.

Life Lesson #3: A huge effort and a lot of pain yield great rewards.

This is not news, and needs no explaining, but I'll say it anyway: childbirth hurts. A lot. But after it's over you have a baby, and a crazy amount of happy hormones. Caring for a newborn is an immense effort, but you get to snuggle them (!), and after about 6 weeks, THEY SMILE AT YOU (!!). Breastfeeding can be a challenge, but it is an amazing, miraculous food for your baby, and helps you to lose baby weight! Spinning might be a little uncomfortable, but in taking care of my body, I get to provide an example to my baby of how to care for her body, and I stay healthy so that I'll be around for more of her life!

Life Lesson #4: When it's over, let it go. Savor moments of rest.

After each contraction, there is a rest. Time without pain, without work. During the rest, you can freak out ("I can't do this for much longer! That one hurt so much! What if the next one is worse?) or you can let it go. If you let it go, you take advantage of the rest, and you're better able to handle what comes next, whatever it is. If the last 10 weeks are any indicator, I'll probably never be able to predict what's next again, so I'm doing my best to just live in each moment fully. And this moment, right here? There's a lot to savor.

Radicchio Carrot Cake

Radicchio Almond Carrot Cake with Orange Mascarpone Whipped Cream
adapted from Dolci, by Francine Segan

Slightly bitter radicchio in a sweet cake; an apt metaphor for motherhood.


For the cake:

3 large eggs
1 cup sugar + extra for sprinkling
8 tablespoons unsalted butter, melted
1 cup all purpose flour
1 cup almond flour (sometimes called almond meal)
2 teaspoons baking powder
1/4 teaspoon salt
Pinch of ground cinnamon
2 carrots, grated (about 1 cup)
1 small head radicchio, finely chopped (about 2 cups)

For the whipped cream:

8 ounces mascarpone
1/3 cup heavy cream
2 tablespoons sugar
1 teaspoon freshly grated orange zest
1 tablespoon orange juice

Preheat the oven to 350 degrees, and butter and flour a 9-inch round pan. In the bowl of a stand mixer, beat the eggs and sugar together until light yellow. Add flour, almond flour, baking powder, salt, cinnamon, butter, carrots and radicchio and mix on low until well-combined. Pour batter into the prepared pan and sprinkle with sugar. Bake for 30-35 minutes, until the top is golden and crackly, and a tester inserted in the center comes out clean. Allow to cool in the pan for 10 minutes, and then turn out onto a rack to cool completely.

While the cake cools, combine mascarpone, cream, sugar, and orange zest and juice, and whip until well-combined and fluffy. Serve alongside the cooled cake, or spread decoratively over the top.

Tuesday, January 15, 2013

Grapefruit Olive Oil Pound Cake

image

I used to read about this plight of new moms -- that every time they had a few minutes to themselves (a blessed few minutes when the baby is asleep!), they would spin around in a circle trying to decide how to spend those minutes. Your brain starts overheating with all these suddenly urgent things you need to do: Shower! Nap! Do some laundry! Empty the dishwasher! Do yoga! Read a chapter of that book that's been sitting on the coffee table for weeks while you watched all 11 seasons of Frasier (who did that? certainly not I.)!

By the time you've decided what to do, say, made yourself a cup of tea and sat down with that book... the baby wakes up. And then you slap yourself in the face for wasting all that time deciding how to spend your time.

What to DO?!

image

I figured out last week that if I made a list of daily goals, I would with absolute certainty not accomplish them, and then at the end of the day I would look around the living room and wonder where all the time went. HINT: It went into the tiny human being who needs to be held and fed about 18 hours a day. Worth it! Still, I'd like to be able to get some things done. So my new idea is to start having a weekly list of goals -- manageable things like fold the laundry, try one new recipe, read a chapter of that darn book, finish writing the thank-you notes -- and just try to pick one every day. Similarly, I would like to make a list of things to do while the baby is napping, so that when I start spinning in my circle, I just glance at my list, pick a thing, and get to it. I'll let you know how it goes.

This year, we celebrated my birthday a little at a time. Gifts from my family, a few cards in the mail, a bottle of Zinfandel from a vineyard we toured on our honeymoon in Napa. A few days later, two different varieties of local honey from the Bay Area, lavender bath salts, a book of quotes by Desmond Tutu, and little sticky page flags with watercolor prints of fruits and vegetables on them. With every box I opened, I thought how lucky I am to have a few close friends who really know me. On Saturday, we took Anne with us for lunch at a new Thai restaurant/sushi bar, and then I went (all by myself!) to have a massage. Little by little, in this new year, we are creating a life for ourselves that is rich and extraordinarily satisfying. We're making plans and growing and learning more each day about love, sacrifice, balance, and priorities.

image

My favorite cakes are the everyday ones; simple cakes that are baked in one pan, that come together quickly and with few ingredients, but leave nothing to be desired in terms of flavor. This cake is a perfect thing to bring to a tea party on a cold January morning, which is just what Anne and I did.

image

Grapefruit Olive Oil Pound Cake
from The Smitten Kitchen Cookbook


For the cake:
1 1/2 cups all-purpose flour
2 tablespoons freshly grated grapefruit zest
1/2 cup granulated sugar
1/2 cup raw sugar
1/2 cup olive oil
2 large eggs
1 teaspoon baking powder
1/4 teaspoon baking soda
1/2 teaspoon salt
2 tablespoons grapefruit juice
1/3 cup kefir (or buttermilk or plain yogurt)

For the syrup:
2 tablespoons granulated sugar
1/3 cup grapefruit juice

For the glaze:
1 cup powdered sugar
2 tablespoons grapefruit juice
pinch of salt

Preheat the oven to 350 degrees. Butter and flour an 8.5x4.5-inch loaf pan. In a large bowl, combine the sugars and grapefruit zest, and blend them well with your fingertips, to infuse the sugar with as much citrus oil as possible. Whisk in the oil, and then add the eggs one at a time. Mix well.

Combine the flour, baking powder, baking soda and salt in a second bowl, and fluff them together with a fork. Combine 2 tablespoons of grapefruit juice and the kefir in a liquid measuring cup. Add half the flour mixture to the oil and sugar mixture, then the grapefruit juice and kefir, and then the rest of the flour, mixing well after each addition. Pour the batter into the prepared pan and bake for 45-60 minutes, until a toothpick inserted in the center comes out clean.

Allow to cool for 10 minutes in the pan while you make the syrup: combine the grapefruit juice and sugar in a small saucepan over low heat, stirring just until the sugar dissolves. Remove from heat. Invert the cake onto a cooling rack set over a pan, poke holes all over the top with a toothpick, and carefully spoon the syrup over it. Allow to cool completely.

To make the glaze, combine powdered sugar, grapefruit juice, and salt in a bowl, and whisk until smooth. Pour the glaze over the top of the cooled cake.

Note: if you are bringing this cake to a tea party, wrap the cake and glaze separately, and pour the glaze over when you get to your destination.

Tuesday, December 13, 2011

Caramelized Pear Gingerbread

Caramelized Pear Gingerbread

My Google calendar looks sort of like a game of Tetris, played by someone who really knows how to play, like my mother-in-law.  (Really, you should see her play - it's unbelievable.)  It feels like it, too.  As soon as I fit something in, something else comes floating down from the top of the screen.  

Another party?!
Are you starting to feel like this, too?  Are you feeling the inevitable stress of the season?  Let's take a tiny step back.  In the midst of frantic shopping, wrapping, mailing, partying, caroling, and decorating, let's just take a moment to pause and enjoy.  Let's bake gingerbread, just for fun.

Here's some good news: this gingerbread has to bake for more than an hour.  And then it has to cool.  So put it together, pop it in the oven, and check some other things off your list while your house fills with the smell of spicy sweet gingerbread.  When it's cooled, put on your favorite Christmas music, make yourself a cup of tea, sit in front of your tree, and enjoy a slice.  It is dense, moist and spicy.  It's got molasses, honey, caramelized pears and pecans, and three kinds of ginger.  And hopefully it's just the thing to scare your inner Grinch away, so that you can really enjoy this wonderful time of year!

Caramelized Pear Gingerbread 1

Caramelized Pear Gingerbread
Adapted from 101cookbooks.com

Ingredients:
1 cup unsalted butter
1/2 cup water
3/4 cup unsulphured molasses
3/4 honey
1 cup firmly packed light brown sugar
3 cups all purpose flour
1 1/2 teaspoons baking soda
1/2 teaspoon salt
2 teaspoons ground ginger
2 teaspoons ground cinnamon
1/2 teaspoon allspice
1/8 teaspoon ground cloves
3 large eggs, room temperature
1/2 cup milk (2%)
1 tablespoon freshly ground ginger root
1/3 cup minced crystallized ginger

3 firm ripe pears, such as Bosc, peeled, cored, and cut into 1/2-inch slices
2 tablespoons butter
1/2 cup chopped pecan halves
1/4 cup light brown sugar
1/2 teaspoon ground cinnamon

In a medium saucepan, combine butter, water, molasses, honey, and brown sugar.  Place the pan over low heat, and stir frequently until butter is melted and ingredients are well combined.  Remove from heat, and pour mixture in a bowl to cool.  In a separate bowl, sift together flour, baking soda, salt, ground ginger, cinnamon, allspice and cloves, and set aside.

Melt 2 tablespoons butter in a large heavy skillet over high heat.  Add pears, and cook about 3 minutes, until beginning to caramelize.  Stir in pecans, brown sugar, and cinnamon, and cook a couple more minutes, until pears are soft but still retain their shape.  Remove from heat and set aside.

Preheat oven to 325 degrees.  Lightly coat the inside of a nonstick Bundt pan with cooking spray, and pour pear mixture into the bottom, spreading evenly.  Add eggs to cooled molasses-butter mixture, one at a time, mixing well after each addition.  Add milk and stir to combine.  Fold in dry ingredients, and don't let the lumps get you down - they'll take care of themselves.  Stir in fresh and crystallized gingers, and pour batter gently over the pears in the pan.  Place cake pan on a cookie sheet and bake 75-90 minutes, until top of cake springs back when lightly touched, and cake tester inserted in the center comes out clean.

Allow cake to cool 15 minutes in the pan, and then gently invert it onto a wire rack to cool completely.  This is pretty tricky, since the cake pan is still hot.  I put the rack upside-down over the cake pan, and then used a kitchen towel to flip it over.  It would be nice to have a friend help you with this, but you can totally do it on your own.

The cake keeps well in the fridge.  Allow it to come back to room temperature before serving, to get the full moisture and texture back.  15 seconds per slice in the microwave works well, too, if you don't have hours and hours to wait (aka if you want to eat it for breakfast).


Friday, September 2, 2011

Chocolate Raspberry Cheesecake


I thought about making a different cake for my hubby's birthday this year.  I found a recipe for a chocolate layer cake with pink raspberry buttercream frosting and chocolate ganache that was just calling out to me.  But the suggestion that I might be making a different cake (but maintaining the chocolate and raspberry elements) was met by heartfelt disapproval by the birthday boy, so I scrapped my delicious pink plan and stuck with what I knew.


It was the right thing to do.  Why mess with perfection?

Chocolate Raspberry Cheesecake

For the crust:
1.5 cups chocolate wafer crumbs
3 tablespoons sugar
3 tablespoons melted butter

For the filling:
2.5 8-ounce packages cream cheese (Neufchatel works perfectly)
1 cup sugar
1.5 teaspoons vanilla extract
1 vanilla bean, seeds scraped and reserved (or 1 teaspoon vanilla bean paste)
3 tablespoons flour
3 eggs
1 cup sour cream
8 ounces melted semisweet chocolate

Preheat oven to 350 degrees.  Lightly grease bottom and sides of a 9-inch springform pan.  Mix cookie crumbs, 3 tablespoons sugar, and butter and press into bottom and sides of pan.  Beat cream cheese, sugar, vanilla extract and vanilla bean seeds in an electric stand mixer until light and creamy.  Add flour and mix.  Add chocolate and sour cream and beat until well blended.  Add eggs one at a time, mixing on low speed until well incorporated after each addition.  Pour into pan and bake 1 hour to 1 hour and ten minutes, until center is almost set.  Run a sharp knife around rim of pan and allow to cool on wire rack before removing rim.  Refrigerate at least 4 hours.

Don't worry if there are a couple of small cracks in the top - it will taste so good nobody will be able to see anything anyway.  And you'll put some homemade raspberry jam on top to complete the magic experience, which will fill in any possible cracks!

For the raspberry topping:
2 pints fresh raspberries, rinsed
1 tablespoon lemon juice
1/2 cup sugar
3 tablespoons corn starch

Stir all ingredients together in a small saucepan, and cook over low heat 15-20 minutes until thickened.  Transfer to a bowl, cover with plastic wrap and cool completely.

Tuesday, June 21, 2011

Lemon-Fennel Cake with Strawberry-Rhubarb Conserve


It took me a few hours to figure out what to do with my huge haul of strawberries from the market last week.  First I thought I would make strawberry shortcake.  Simple, allowing the strawberries to show off.  Then I considered this strawberry summer cake.  Then this strawberry upside-down cake with cardamom.  I couldn't decide!  I agonized!  I searched!  I read recipe after recipe trying to find something that would be worthy of these first summer strawberries.  I had settled on a strawberry-rhubarb crumble - the perfect way, I thought, to highlight the short period of time in which both are available!


Then, at the last minute, I didn't.  I decided to make an unrelated cake, and top it with a simple conserve of strawberries and rhubarb.  And I was right.  I will surely be making some cakes, pies, and crumbles with the strawberries to come, but for now, this was exactly what I wanted.  Plus, a bonus!  There's leftover conserve in the fridge, ready to be spooned directly into my mouth when I need a shockingly delicious reminder that it's finally, officially summer!  Happy summer, everyone!


Lemon-Fennel Cake with Strawberry-Rhubarb Conserve

The combination of ground pine nuts, yogurt, and olive oil gives this cake an almost pudding-like texture.  It is not too sweet, and is very delicious toasted the next morning for breakfast.

For the cake:
1 1/4 cup unbleached all-purpose flour
3/4 cup ground pine nuts
2 teaspoons baking powder
1/2 teaspoon kosher salt
3/4 teaspoon ground fennel seeds
1 cup plain whole-milk yogurt
1 cup granulated sugar
3 large eggs
1 teaspoon lemon zest (from 1 lemon)
1/3 cup olive oil

Preheat the oven to 350 degrees.  Grease an 8-inch standard loaf pan, and line with parchment so that the edges are folded over the sides like this (this makes the cake SO EASY to get out of the pan - it's like a little hammock you can use to lift it onto a cooling rack!). 

Sift together the flour, pine nuts, baking soda, fennel seeds and salt.  In a separate bowl, combine sugar, eggs, and lemon zest.  Whisk the wet ingredients into the dry ingredients.  Fold in the olive oil.  Pour batter into the prepared loaf pan, and bake for 50-55 minutes, until a tester inserted in the center comes out clean.  Allow it to cool in the pan for 10 minutes, and then remove to a cooling rack and cool completely.

Serve with strawberry-rhubarb conserve and a little dollop of plain whole-milk yogurt.

For the conserve:
2 cups hulled and halved super-ripe strawberries
2 cups chopped fresh rhubarb
1/3 cup granulated sugar
1 teaspoon corn starch
zest of 1 lemon, in strips

Combine all ingredients in a medium saucepan over medium heat.  Cook, stirring frequently, until thickened and bubbling, but not so long that the fruit loses all of its shape.  Remove the lemon zest strips, cool and serve.

Wednesday, June 15, 2011

Meghan's Soulmate Chocolate Cake

I had lunch with my sweet friend Meghan today!  She is not often able to get out of her office for a full hour during lunch time, so it was a rare treat to get to meet up with her.  We celebrated by meeting at Siam Rice for bowls of delicious, happy-making, hot Thai curry.  Which is especially perfect because it is once again cool, cloudy, and rainy here in the Windy City, and we need something to warm up our bellies and put a smile on our faces!

Speaking of putting smiles on people's faces, let's talk about a life-changing cake.

I know I keep talking about Molly and her book and her blog, but there is good reason for that.  I love her writing, and I love her recipes.  So I'll just keep talking about her, ok?  Anyway, since I read about her "Winning-Hearts-And-Minds" cake, I have been dreaming about it.  Dark chocolate, mouthwatering dreams.  This cake almost brings me to tears because it is everything a chocolate cake should be.

(I just remembered this wonderfully hilarious cake vs. pie post I read over at Hyperbole and a Half the other day, and I would just like to say that this cake is absolutely NOTHING like that yucky-looking store-bought birthday cake she's talking about.  And this cake kicks pie's little butt.  Just sayin'.)

After eating this cake for dessert last night (and then again for breakfast this morning shhhhhh), I decided I needed to bring Meghan some so that she could share in my ultimate cake joy.  Why I decided that a plastic sandwich bag was the way to transport it is beyond me.  I have perfectly respectable tupperware containers just waiting to be recruited for jobs like this.  But no, I stuck some cake in a plastic bag, threw it in my purse, and went on my merry way.  To the train, to work, to lunch.  Then I took the plastic bag out of my purse, and it looked like something I had forgotten to throw away after taking a dog out.  No lie.  BUT!  That does not affect the way it tastes.  After Meghan took it back to her desk and ate some, she said to me, via gchat, AND I QUOTE:

"I didn't even know about it, but i think i've been dreaming of this cake my entire life.
We're soulmates.
Well...until i finish devouring it."

So I will name this cake...

Meghan's Soulmate Chocolate Love Cake
(aka Winning-Hearts-and-Minds Cake)
adapted from A Homemade Life by Molly Wizenberg

Some little notes about this: I used Equal Exchange Organic 65% Dark Chocolate from Ecuador, and it was amazing.  I hadn't used European-style butter before, but oh my gosh.  It is so much softer and more luxurious than other butter.  A couple minutes out of the fridge, it has a texture almost similar to Brie, which convinced me of its higher fat content.  It melts like nobody's business.  I love it.

7 ounces dark chocolate, finely chopped
1 3/4 sticks European-style butter, in smallish pieces
1 cup + 2 T granulated sugar
5 eggs
1 T unbleached all-purpose flour

Preheat oven to 375 degrees.  Butter an 8-inch cake pan, fit a round of parchment paper in the bottom, and butter the parchment.  Place the chocolate and butter in a medium bowl.  Microwave in 30-second increments, and stir until smooth (or melt over a double-boiler).  Add sugar, stir to combine, and let cool for a couple minutes.  Add eggs, one at a time, stirring until incorporated after each addition.  Stir in the flour.  Pour the batter into the prepared pan.  Bake for about 25 minutes.  Lick the bowl and spoon clean while it's baking.  Don't listen when your husband makes fun of you and tells you you've already had your piece of cake.  Cake will look barely set in the center when it's done (Molly says to check every 2 minutes starting at 20).  Cool for 15 minutes in the pan on a cooling rack.  Place a piece of foil over the cake, and turn it onto a plate (not the serving plate).  Put the serving plate upside down on top of that, and being very careful not to crush the cake, flip it back over.  Remove the top plate and foil, and cool completely before eating.  Or if you're like us, cool until you can't take it any longer, and then revel in the fudgy goodness.  Serve with lightly sweetened whipped cream, if desired.

Monday, May 23, 2011

Rhubarb Week!


I am obsessed with rhubarb right now, and I decided to make it official. 

I hereby declare this to be the Coppertop Kitchen Official Week of Rhubarb!


For my whole life, I have been content to make one rhubarb crisp a year, sit down and eat the whole thing myself with a spoon, and wait until next spring to do it again.  This year, I decided to find out what else I might be able to do with this delicious seasonal vegetable/fruit!  Each day this week, I will devote my time here to sharing little-known-facts about rhubarb, and some recipes that don't (all) involve strawberries and/or pastry.


Did you know?
Rhubarb was first cultivated in China for medicinal purposes (it is a digestive aid, and can be a mild laxative), and was first grown for culinary purposes in Britain and America in the 18th century. 


Rhubarb Cornmeal Upside-Down Cake
adapted from Bon Appetit, June 2008

This recipe originally used cherries and balsamic vinegar instead of rhubarb and bourbon, but my version worked beautifully.  Also, I don't have an appropriately-sized and -shaped skillet, so I used a regular 9-inch cake pan. 

3/4 cup (1 1/2 sticks) unsalted butter, room temperature, divided
1/4 cup (packed) dark brown sugar
1 tablespoon plus 1 teaspoon bourbon 
3 cups chopped fresh rhubarb (4-5 stalks) 
1 1/4 cups all purpose flour
1/4 cup yellow cornmeal (preferably stone-ground medium grind)
2 teaspoons baking powder
1/4 teaspoon salt
1 cup sugar
2 large eggs, separated
3/4 teaspoon vanilla extract
1 teaspoon bourbon
1/2 cup whole milk
1/4 teaspoon cream of tartar

Position rack in center of oven; preheat to 350°F. Combine 1/4 cup butter with brown sugar and 1 tablespoon bourbon in 10- to 11-inch ovenproof skillet with 2-inch-high sides. Stir over medium heat until butter melts and sugar dissolves, about 2 minutes. Increase heat to high; add rhubarb and bring to boil. Remove from heat.

Whisk flour, cornmeal, baking powder, and salt in medium bowl to blend. Using electric mixer, beat 1/2 cup butter in large bowl. Add sugar; beat until pale and fluffy, about 3 minutes. Beat in egg yolks, vanilla and 1 teaspoon bourbon. Add flour mixture alternately with milk in 2 additions each, beating just until blended and occasionally scraping down sides of bowl. Using clean dry beaters, beat egg whites in another medium bowl until foamy. Add cream of tartar and beat until whites are stiff but not dry. Using rubber spatula, fold 1/4 of whites into batter to lighten slightly. Fold in remaining whites in 3 additions (batter will be thick). Spoon batter over rhubarb in skillet, then spread evenly with offset spatula to cover rhubarb.

Bake cake until top is golden brown and tester inserted into center comes out clean, about 45 minutes. Cool in skillet on rack 5 minutes. Run spatula around edges of cake to loosen. Place large serving platter upside down atop skillet. Using pot holders or oven mitts, firmly hold platter and skillet together and invert. Leave skillet atop cake 5 minutes. Remove skillet. If necessary, rearrange any fruit that may have become dislodged. Let cake cool at least 45 minutes. Cut cake into wedges and serve slightly warm or at room temperature with vanilla ice cream or bourbon-laced fresh whipped cream.